


We recently launched our YouTube channel for IncomeDiary. Already, we have had many people contact us asking how we created our short videos. We heard you, so we will show you the exact step-by-step instructions to help you create your own compelling videos. At the end of this article, we have also included steps on how to properly upload your videos to YouTube as Shorts. Anyone can upload videos, but not everyone knows the correct settings; unfortunately, uploading with incorrect settings can hurt your channel and cause frustration. Therefore, we took the time to break down the process for you.
Video Tutorial: How To Post a YouTube Short
In this article, we will show you how to create a short video and properly upload it to YouTube as Shorts.
What’s needed to create a YouTube short video
There are 10 steps:
We hope you enjoy the step-by-step guide as much as we do. Please let us know what you think in the comments.
Creating a Short Video for Social Media
Before you begin, here are the tools you will need to create your short videos:
- Notepad
- Voiceover editing tool (such as Speechify Studio, or AI Murf)
- Image and video editing tool (such as Canva Pro, CapCut, or Clipchamp)
- Calculator
- Want to outsource this whole method? We use OnlineJobs for quick, effortless, low cost hiring of freelancers.
Step 1: Gather Relevant Facts and Create a Script
Start by gathering interesting and relevant facts for your video. Fun facts keep your audience engaged, so make sure to find something that captivates! Below is just an example of how we collected our facts. We use Forbes and other refutable websites as our sources. Your data gathering depends on the topic you want to cover.
Based on your research, write a script divided into three parts:
- Opening: Start with a hook to grab attention.
- Body: Highlight the key points of your topic.
- Closing: End with an ultimate lesson that leaves viewers thinking.
The script below is what we used for Jack Ma’s short video.
Step 2: Add Voiceover to Your Script
We use Speechify Studio (for a cheaper option you can use AI Murf) to add a narrator to our text. There are three benefits from choosing this over a traditional narrator: it’s cheaper, more efficient, and it sounds professional and realistic. For only $69 a month, you receive four hours’ worth of voiceover credits, along with other benefits, and you can choose from a variety of voices and languages. Below are the steps to add a voiceover to your script on Speechify Studio.
- Paste or type the script in the block.
Step 3: Refine the Script
Make sure to refine your script to fit within 60 seconds. Keep it short and simple. For instance, the script below is 26.6 seconds, which is fine. But if gets longer than one minute, you will have to trim it below 60 seconds.
You can do this by doing two things: by rewriting your script or by adjusting the speech speed of the voiceover.
We default between 18% and 23%. The voiceover sounds more upbeat and really works well with short videos.
Step 4: Create Visuals
Next, design visuals that complement your script. We use Canva Pro to create and design our visuals. Incorporate photos and videos that resonate with your content.
In creating your visuals, it is important to follow your own branding. Consistency is key to creating appealing designs. We primarily use the colors in our website, such as moss green, dark orange, and blue. Use color pallets that resonate with your brand voice.
Here’s how we created one of the visual slides.
- We selected Your Story to match the mobile view for YouTube Shorts.
To create the IncomeDiary screen frame, we inserted a rectangle and redefine it. We did this by:
- Clicking Elements.
- Looking for rectangle shapes and selecting the first one.
- Placing the rectangle at the upper left corner.
- Expanding it all the way across the other side.
- Trimming it a bit to our desired height.
- Copying the rectangle.
- Placing the copy at the bottom and adjusting it.
After creating the frame for all our slides, we added our IncomeDiary logo. We did this by:
- Clicking Uploads.
- Clicking Upload files.
- Choosing the logo file (.svg)
- Placing it within the upper rectangle.
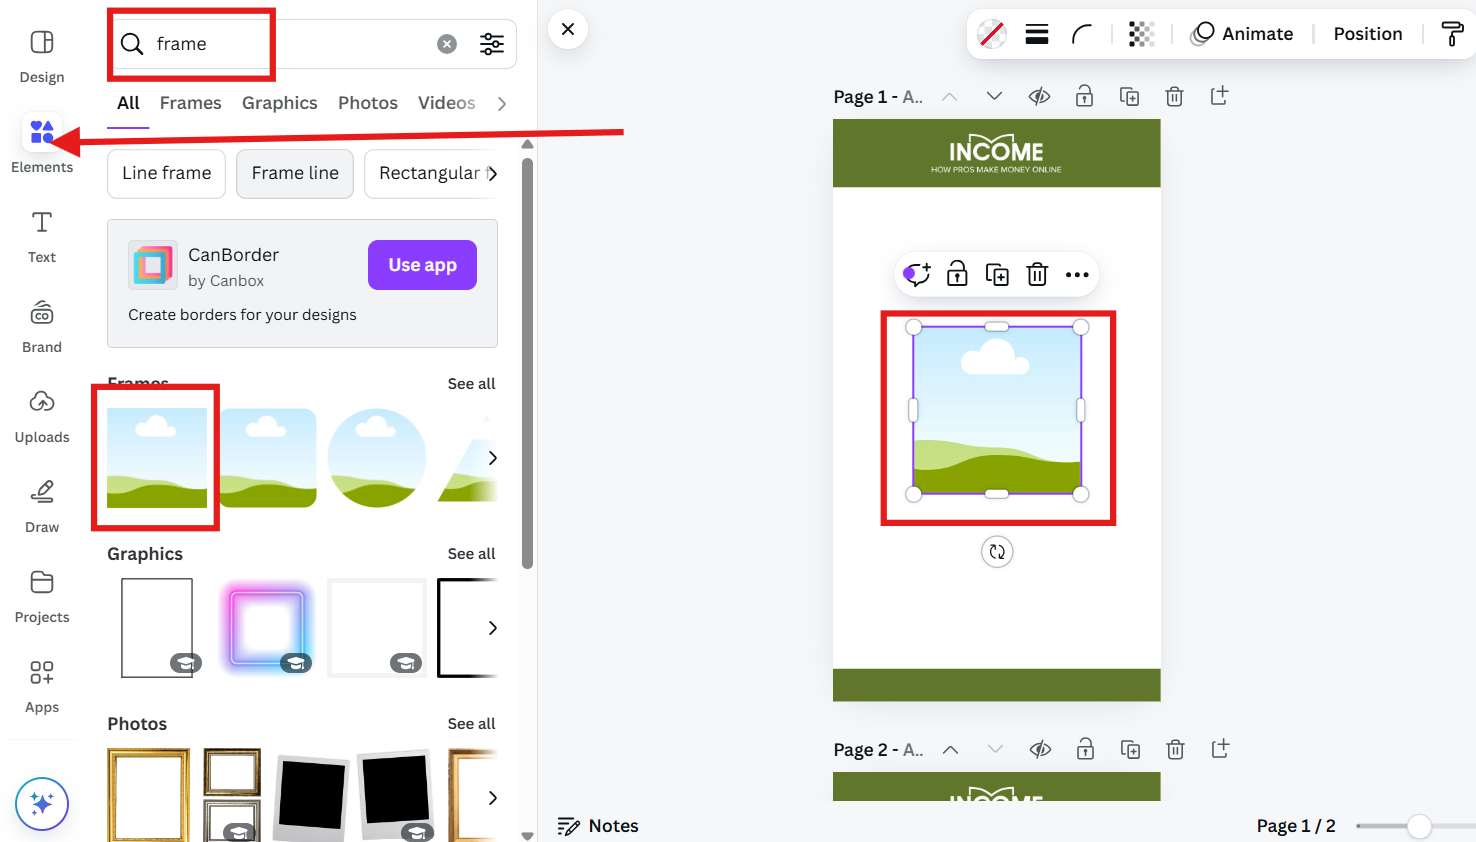
Then, to create Jack Ma’s introduction video, we used a square frame and attached the video to it. You can do this by:
- Clicking the Elements again.
- Typing in or looking for frame.
- Clicking Uploads and Upload files again.
- Selecting the video file, dragging it into the frame, and adjusting its size.
For our text font, we used Inter. For the font size, we used 80 for the heading and 45 for the subheading. To insert text into your slide:
- Click Text.
- Click Add a heading and Add a subheading and change the font and font size.
For texts that overlap images, we put an orange box behind the text. You can do this by adding an effect to your text.
- Click Effects.
- Select Background.
- Adjust the roundness depending on your preference. We preferred no round corners for our videos.
- Select a color based on your brand image.
You can also add animation to your texts. We used a typewriter animation for our text.
- Click Animation.
- Then, select your preferred animation and adjust its setting.
Step 5: Sync Visuals with Scripts
Once you’re done with all your visuals, you want to sync them with the voiceover blocks to ensure everything flows seamlessly. We use “play and pause” to get the right timing. Let’s say you want a particular visual to appear with a specific spoken word. Play the voiceover and pause at the word where you want the visual to show up.
In the example below, we wanted his net worth to appear when spoken. We did this by doing the following:
- Play the voiceover block and pause at 3 seconds because that’s when the net worth was spoken.
- On a notepad, record the timestamp.
- On Canva Pro, trim the video length. See the image below.
This means that the first slide will run for 3 seconds, and the next slide containing the net worth will start right after it. You can use a calculator to calculate the duration between voiceover scripts. The two images below show that the two slides match the corresponding voiceover block’s duration (0:11:4).
Slides:
Voiceover block:
Meaning, the length of the two slides above total to 11 seconds and 4 milliseconds, which perfectly match the length of the voiceover block. Once you have recorded all the timestamps, you can then adjust the length of your slides to match your voiceover scripts.
Step 6: Upload Visuals
Upload your visuals to Speechify Studio and add them to their corresponding voiceover blocks.
- Click Upload and select the desired files.
- Once the files have been uploaded, click the + sign on the file (red box), and it will be added to the selected voiceover block (blue box). See the image below.
Step 7: Set Portrait Resolution
Remember to set your video resolution to portrait (9:16) for optimal viewing on mobile devices. See the images below.
Step 8: Add Music to Your YouTube Short
You can add music to YouTube shorts by using Speechify Studio (the one that we used), Murf AI for a cheaper option, or you can also add one via YouTube Studio. When selecting background music for your project, keep it at the lowest volume level. You want the music to enhance the video, not overpower the voiceover.
Here are the steps to add music to your YouTube Shorts.
- Click Music and select one from hundreds of royalty-free sounds that best suits your theme or topic.
- Set the two middle lines at the lowest level.
Step 9: Export & Download
Finally, export your project and download it.
Now you’re all set to share your engaging short video with the world!
Step 10: Upload Your Video to YouTube
Before we go any further, let’s talk SEO.
Video search engine optimization
Now, when it comes to ranking your videos in YouTubes and Googles search engines, you must consider a few basic things.
Firstly, you must decide which search terms you want to rank for. A search term is something someone types into the search engine.
For example, our video is about rich online entrepreneurs.
So maybe we should rank for online entrepreneurs. The question is, will someone search for this?
To find out, go to SEMrush and type in “online entrepreneurs.” You will see about 1,000 people search for that every month.
Ok, well, that’s not a lot.
Let’s try billionaires instead. In SEMrush, it shows that it gets about 250,000 searches a month.
The next thing to consider is a more niche version of this search term. For example, you could consider tech billionaires (1000 searches) or UK billionaires (2500 searches). What we are trying to achieve is multiple search terms. We want to rank for billionaire, but that’s going to be difficult and may take some time, so at the same time, we will try to rank for something much easier.
Now that you have decided on your search term, you want to use it in your video name, title, description (twice), and thumbnail name.
So, for example:
Video name: tech_billionaires.mov
Video title: 5 Richest Tech Billionaires 2024
Video description: Discover the fascinating world of tech billionaires in this insightful video. Learn about the latest achievements and innovations of these tech billionaires and gain valuable insights into their success stories.
Video thumbnail: tech_billionaires.jpg
You also want to mention this phrase in the first 10 seconds of your video and throughout.
Ok, so carrying on with optimising your video.
Here the steps and tips to upload your videos to YouTube as shorts.
Set Video Below 60 Seconds
You want to ensure the video is 59.9 seconds at the most. For some reason, YouTube always adds an extra second to your video. For instance, if you upload a 60-second video, it will end up as a 61-second video, and YouTube will treat it as a long video.
How to Upload YouTube Shorts
YouTube Studio is a special in-app tool designed to help creators create, manage their content, and analyze their performance on their YouTube channels.
- Click Select files and choose the video you want to upload.
Add Details
Add a catchy title or headline and a description that best describes your video. Use hashtags and choose keywords related to your video, so it will appear when people search videos using these keywords.
Choose the Correct Settings
Ticking and unticking these boxes correctly will help you get more views.
Audience
- Choose “No, it’s not made for kids” unless your content is specifically made for kids. Choosing the other option will narrow down your audience and reach.
- Click “No, don’t restrict my video to viewers over 18 only.” This option widens your audience and reach.
License
Under License, you will see two ticked boxes by default. Don’t touched them.
- Allow embedding allows you to embed the video into your website and other sites.
- Publish to subscriptions feed and notify subscribers notifies your subscribers after publishing the video.
The rest of the boxes are optional.
Video Elements
Once you’ve finalized the details, click Next to move to the next setting, which is video elements. Under this tab, you can link the video to the other available videos on your channel.
You can also add subtitles to the video. There are three options: you can upload a file, let YouTube automatically do it for you with their auto-caption, or you can manually type them.
Once you’re satisfied with the video elements, the next tab to focus on is the last one.
Visibility
Under this tab, you can choose how you want to publish your video. See the three radio buttons in the image below for description.
Click Save and voila, you’re done!
You can also schedule your video. This option is really powerful and saves you a lot of time. With this, you can plan ahead, put your videos in a queue, and edit them before they even get published. Click Schedule, and you’re set!
And that’s it! You’re ready to create captivating videos.
Remember that with the right tools, thorough research, and creativity, you can create short videos that will captivate and keep your audience engaged. Your first video doesn’t have to be perfect; you will learn and pick up things along the way. Watch other creators and learn from them as well. Lastly, great things take time to build and create. So, don’t rush and do invest as much as time in your content, and you will see your effort pay off in time.
Now that you have been equipped with the tools and knowledge to create your own short videos and upload them to your social media accounts, what topic will you choose for your first project?
Want Someone to Create These Videos for You?
We used the job site OnlineJobs to hire someone to follow this exact method to create our videos for us, spending as little as $25 for each short video.
We highly recommend you check it out. It’s really quick, within a few hours of posting a listing we had over 50 freelancers contacted us. We hired the ones we liked best and saved other contacts, so we can reach out to more freelancers later without having to subscribe again.
It’s definitely worth it if you ask me!
FAQ about creating YouTube videos
How do YouTube Shorts work?
YouTube Shorts lets anyone reach a new audience using just a smartphone and the Shorts camera in the YouTube app. The tools for creating Shorts make it easy to make videos that are up to 3 minutes long with the app’s multi-segment camera.
Do I need a specific camera to create YouTube Shorts?
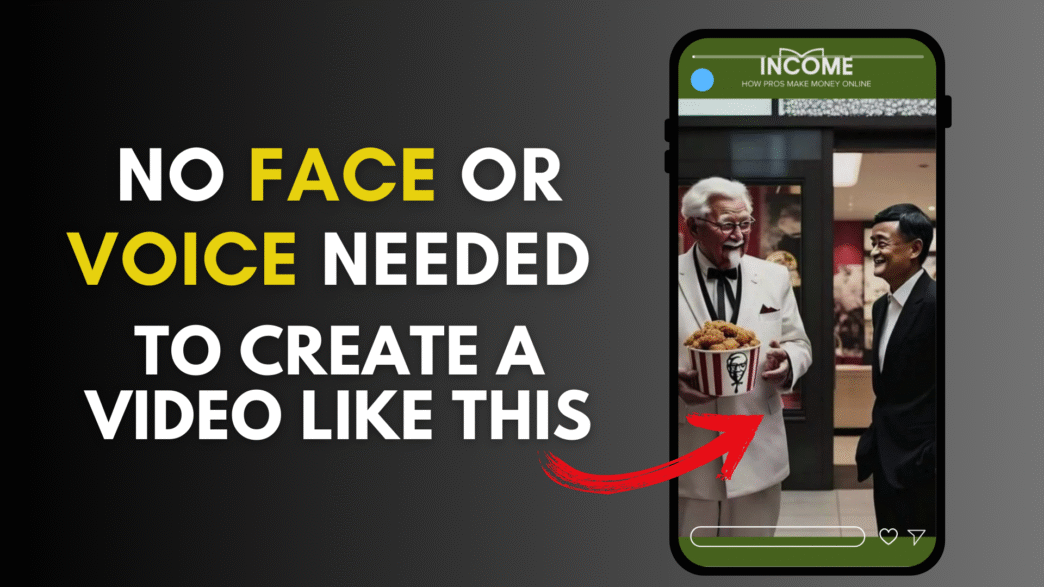
No, you don’t need a specific camera. You can use your smartphone to record high-quality Shorts. You can also follow our tutorial video, allowing you to create videos even without using a camera, your face and voice.
What to post on YouTube?
When deciding what to post on YouTube, it’s important to consider your interests and expertise. You can create tutorial videos, product reviews, vlogs, travel videos, cooking demonstrations, educational content, or even share your thoughts on various topics. It’s essential to choose content that you’re passionate about, and that will resonate with your audience. Additionally, engaging with your viewers by responding to comments and asking for their input on future content can help you build a loyal audience. If you need more insights on how to create great content, check out: Content Creation: 10 Lessons From 50 Million Visitors. Although it primarily focuses on creating written content, the principles of content creation are essentially universal.
Can I monetize my YouTube Shorts?
Yes, you can. In order for you to monetize your shorts, you need to be in their YouTube Partner Program (YPP). You can check your eligibility milestone in the Earn area of YouTube Studio. You need to get 1,000 subscribers with 4,000 valid public watch hours in the last 12 months, or
get 1,000 subscribers with 10 million valid public Shorts views in the last 90 days. Keep in mind that any public watch hours from Shorts views in the Shorts Feed will not count towards the 4,000 public watch hours threshold.
How much will I make from YouTube shorts?
The amount you can make from YouTube Shorts varies widely based on factors like the number of views, engagement rate, and monetization options. YouTube has introduced a Shorts Fund, which provides financial incentives to creators, and ads may become part of the Shorts ecosystem as well. Ultimately, earnings will depend on your content’s performance and audience engagement. Rough estimates suggest that creators can earn anywhere from $0.01 to $0.03 per view on longer videos with traditional monetization.
For YouTube Shorts, since the monetization model is still developing, earnings could be lower initially. Some creators report earnings ranging from a few dollars to several hundred dollars per month, depending on their audience size and the total views on their Shorts. However, the exact figures can vary greatly among different channels and content types.
With Creator Pool, when your Short is seen 1 million times, so you receive 1% of the Creator Pool, which is $900.
How can I promote my YouTube Shorts?
Share your Shorts on social media, engage with your audience through comments, and encourage viewers to subscribe to your channel for more content.
What are some tips for creating engaging YouTube Shorts?
Focus on a strong hook in the first few seconds, use engaging visuals, keep your content concise, and consider trends and popular themes to capture viewers’ attention.
Why should I create short videos for my online business?
Good and valid question! If you’re not convinced that you should start creating videos, let this chart convince you.
As you can see, web traffic is shifting toward short videos. This means that about 90% of web traffic will consist of short videos in the coming years. Moreover, if you search for any medium-sized website using Semrush, you will see that in recent years, the web traffic for blog articles has decreased significantly. Leveraging short videos (courtesy of Sprout Social) to drive traffic to your site and gain more subscribers is an effective strategy.
Next highly recommended reads:
How To Get More YouTube Views and Subscribers: Every Strategy Known
Creating YouTube Shorts: Benefits Of Long Vs Short


